How To Change Battery In Prius Key Fob
 Caleb Butler
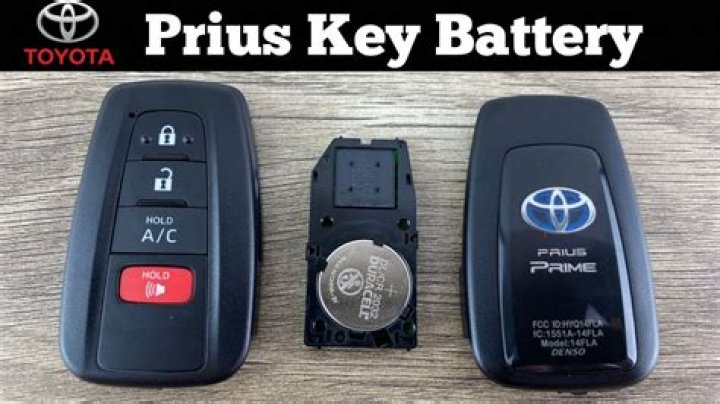
Before you start taking your Toyota Prius Key Fob apart, you will need t have the replace battery ready. The battery that you need is a 2032 button cell battery. Also, you will need a micro Phillips screwdriver. This particular screwdriver is magnetic, which means that the screws will attach to it. Continue reading to learn how you can change the battery in your Toyota Prius Key Fob.
Silky Terrier Dog Breed Playing Aro... Silky Terrier Dog Breed Playing AroundChange Battery in Toyota Prius Key Fob
Step 1
The first that you need to do is to remove the key from the housing. To do this, you will have to slide the mechanism that you see at the bottom towards the left. The key should be facing you when you pull it out, also the Toyota logo should be in the correct position. It should come out without any issues.
Step 2
Now you will have to remove the covering that is on the back of the smart key. This will be the side that has the Toyota logo. To do this, you will need to slide out the mechanism that is at the bottom to the left while you apply pressure to the covering. It may take a bit of effort depending on the age of your key is. If you are having trouble, there should be a seam at the top, which is right above the Toyota logo, where you can pus and slide it a lot easier. You could use a credit card or even a guitar pick to get the job done. Also, ensure that you don’t use anything metallic to open it because it can result in damage.
Step 3
Once the casing is completely off, you will have to remove four screws . You can use a micro Phillips head screwdriver. However, remember to be gentle. If not, you could strip the heads of the screws. Once they screws are removed, you can use a plastic tool, or even a flat head screwdriver to lift the covering that you got the screws from. You should be able to get it out without any issues, which will allow you to see the battery.
Step 4
Apply a small amount of pressure to the old battery towards the flanged edge of the holder. It should easily protrude out. Remember to take note of the exact way that the battery is facing so that you’ll be able to insert the new one correctly. Remove the old battery out, and gently slide the new battery in place. Don’t forget to put it in the correct way, the positive terminal of the battery should be face towards you.
Step 5
Replace the plastic cover as well as the four screws that are on the internal housing. Don’t tighten the screws too much because that can cause damage that you don’t want to happen. Put the outer casing (the one that has the Toyota logo) back on. Slide it right into place, and ensure that you press and slide the bottom mechanism to the left. It should click into place. Insert the key back in its place; do this by sliding the mechanism towards the left.
Step 6
Next, you will to check that it is working by by pressing the lock or unlock buttons. If it’s working, you should see a blinking red light. That’s all that there is to it.