How to change hydraulic cylinder seals
 Caleb Butler
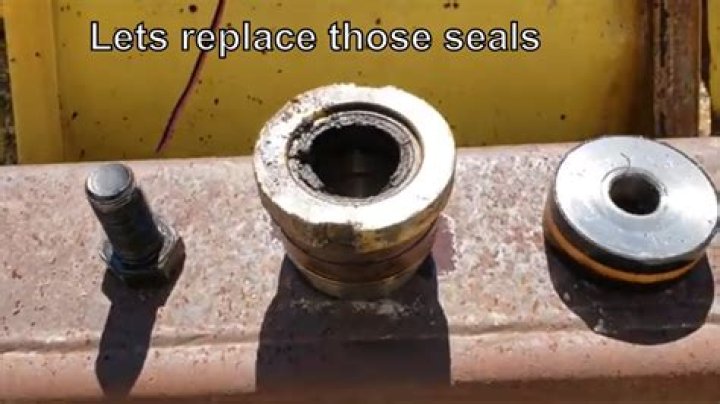
Sledge Hammer Small, Medium, and Large Straight Blade Screw Divers Standard Hammer 90° Pick 8mm Allen Head Screw Driver 10mm Allen Head Screw Diver Spanner Wrench Vice Hoist Hydraulic Press (To hold cylinder to table)
Silky Terrier Dog Breed Playing Aro... Silky Terrier Dog Breed Playing AroundRemove the set screws that are
located in the head nut and the
top eye. (The set screw in the top
eye ONLY needs to be removed if the
top eye of the cylinder is to be
removed.. The top eye MUST also
be removed if replacing the top
eye back-up thread seal.)
2. Secure the cylinder so that it will
not rotate.
3. With the cylinder secure, begin removing the top eye (If needed). Use a bar for leverage; the eye is threaded into the final stage via righthand thread.
4. If you have removed the eye, you will need to replace the seal. Remove and discard the old seal and replace it with a new one. You may need to secure the top eye in a vice for the removal and installation of the seal. Do not slide the seal along the threads; instead, screw the seal onto the threads so that the internal lip of the seal remains intact without becoming damaged.
5. Remove the head nut by using a spanner wrench and the two construction holes on the head nut. The head nut is attached to the housing via the right-hand thread. Place a pan below the head nut to catch any residual oil. (Note the head nut may grip the stages tight enough to cause all stages to rotate.)
6. All of the stages will pull out of the housing as one unit at this time. Use caution as the “nest” of tubes will be heavy. (Note the thread seal may cause the head nut to hang up while attempting to remove it from the housing.)
7. Remove and replace the head nut thread seal. Be sure to clean the seal seat, and apply white lithium grease prior to installing the new seal.
8. Secure the “nest” of tubes so that you can remove the head nut from the tube “nest”.
9. Using a hard plastic driver and a sledge hammer, drive the head nut until it is removed from the “nest” of tubes.
10. With the head nut now off, remove the (1) wiper, (2) wear rings and (1) high pressure seal. Wiper
11. Remove the wear ring(s) from the piston end of the stage. The 5” cylinder is the only series of Muncie cylinders that has only one wear ring at the base/ piston side of the stage.
12. Using the stiff/elastic material and the sledge hammer, hammer the smallest stage so that the snap rest ring is fully exposed.
13.. Use extreme caution as the ring may shoot out while attempting to remove it from its seat.
14. Using the stiff/elastic material and the sledge hammer, drive the small stage back towards the piston side of the tube “nest”. Once it has made it past the seal, the stage can be pulled out by hand. (Use caution as the weight of the various stages may require the use of a lifting device.) 15. With the stage removed from the nest of tubes, remove the wear ring that is located at the piston end of the stage.