How To Change Material In Solidworks
 Rachel Davis
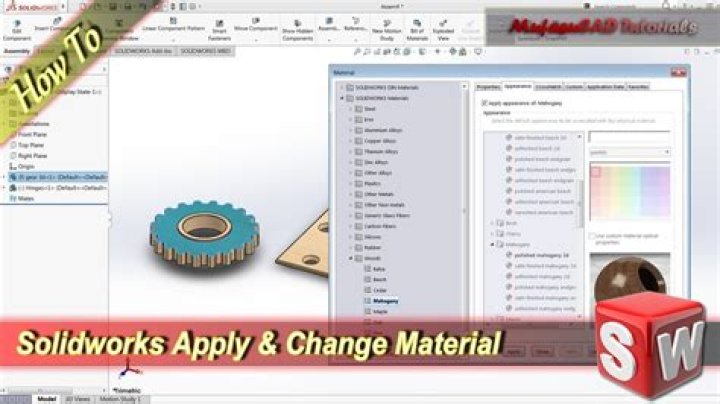
We’ll be talking about how to alter the materials in SOLIDWORKS. These are some tips for you on how to customize them according to your needs. Let’s get started. The creation of materials to create material SOLIDWORKS is something I’ve previously talked about in a prior technical tip, I’ll share the video below. We’re gonna tell you how to alter materials in SOLIDWORKS by using screws with hex caps we’ve previously discussed in our blog posts. Making changes to the material in SOLIDWORKS is simple – all you have to do is click Materials > Features, right-click, then select Modify Material.
Silky Terrier Dog Breed Playing Aro... Silky Terrier Dog Breed Playing AroundThe material database that is provided in SOLIDWORKS will then show up. When you hover your mouse on those materials, you will see a box that informs you of where the database is located. For example, you could decide that you would like my model to be made of steel, and also made of AISI 1020, and then hit apply. SOLIDWORKS will then adopt all the properties of the material. One of the most frequent questions I receive is if there’s any way to modify the characteristics of the materials to customize them or to create them according to your personal requirements.
You can add customize the materials according to your personal requirements. One method to accomplish this is to use the right mouse button on my AISI 1020 and select to edit the material. At the bottom of the screen, you will see a menu known as Custom Materials which is in its own database at another location. You can also build your own customized material database, by creating a brand new library (right-clicking in the gray area). Open Local Disk C on your computer, and create a new folder and give it a name that is unique from others. When you are in the folder, you can give the database also a unique name and save it.
Now you will observe that on the SOLIDWORKS interface you will see your new directory. Next, you need to right-click the new directory, and then select Create Category. In my instance, I’ll name the brand new directory Custom Steel. Then you can go to my SOLIDWORKS materials and then look at an AISI 1020. The fields in this one can’t be altered because they’re all grayed out. Then right-click to AISI 1020 and then Copy. Click in the upper right corner of your mouse under the My Custom Steel folder and hit Copy. Now you have a brand new custom material which you can change the name of Custom 1020 and apply it. The tree in my account will be Custom 1020. You can modify the properties of the material.