How To Paint Behind A Toilet
 Ethan Hayes
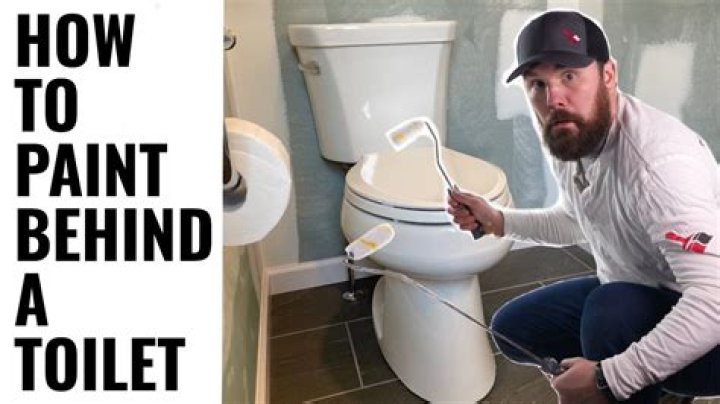
If you are planning to revamp your bathroom, you’ll be required to learn which way to apply paint to the wall behind the toilet. It’s easy to realize it’s the most difficult place within the bathroom that you can paint. There’s not much room to work in there, and it’s a bit dusty and there are pipes that you can paint. With a bit of planning and extra care you’ll be able to complete the job.
Silky Terrier Dog Breed Playing Aro... Silky Terrier Dog Breed Playing AroundWhichever method is mentioned below, which one you decide to use to paint the back of your toilet, the steps you follow to prepare the area are the same, and will ensure that the paint is beautiful and remains free of mold for years to come. Apply a primer coat to the walls you’re painting. The primer helps paint stick to the wall and creates better consistency and longer-lasting color, so it’s well worth it to take the time to complete this additional step.
The next thing to decide is which method is best for painting the walls that are behind the toilet. Examine the distance between the tank of your toilet and the wall to figure out the method that follows is the best choice to paint behind your toilet.
Alternative 1: Sponge brushes (for 2-inch clearance and more)
If the toilet is at least a few inches of the walls, then you might be capable of painting the walls behind the toilet using paint sponges. Paint only just one of the sides and then carefully apply even coats of paint to the wall behind the toilet. Start in the center of the tank, then gradually move to the sides.
Option 2. The Wooster Brush Miniroller (for one-inch of clearance)
If you’ve got less than 1 inch of space between your toilet and the wall The Wooster Brush Miniroller with a 3/8-inch nap on the roller should suffice. It functions just like other paint roller , it’s just smaller.
Option 3. Jimmy Sponge Stix (for one-inch of clearance)
Another great option for 1-inch-close-to-the-wall paint jobs is Jimmy Sponge Stix, which looks similar to a paint stir stick that has a strip of sponge running along one side. All you need to do is apply a regular paint roller for applying paint on the sponge’s surface and then slowly move this stick in between the wall and toilet. Jimmy Sponge Stix measures 3/4-inches in thickness and if you don’t have that much space between you and your toilet, the device is unlikely to be able to work.
Option 4: Remove the Toilet, Then Paint
There are toilets that are in such a way there is no way to paint behind them. In this instance you’ll need to remove the toilet in order to paint the wall in front of it, then put it back.