How To Screen Record On iPhone 8 Plus
 Sarah Silva
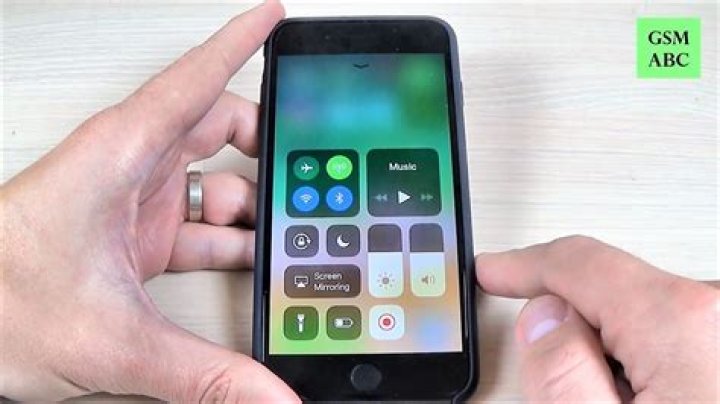
It should not be difficult to record your iPhone’s screen. Both iPhone 8 and iPhone 8 Plus have the right tools to capture funny moments to look back on or share important information with others. If you don’t have the necessary experience but still want to be able to capture the iPhone’s screen, then the following information should suffice. You won’t have any problems once you know how to screen record iPhone 8. The process is similar to taking a screenshot of your iPhone’s screen but in video format.
Silky Terrier Dog Breed Playing Aro... Silky Terrier Dog Breed Playing AroundTo begin, make sure that the feature to record screen is enabled. In the Settings menu, select the Control Center section, then choose Customize Controls.
There’s an icon for the recording screen. It’s a white circle with a red background. Drag the icon into the Quick Menu section, or simply click the green + symbol. By doing this, you will have easy access to the feature of recording your screen.
Once the icon appears in that quick-access bar, you’ll be able to begin recording the iPhone’s display. Choose the screen you wish to record. It could include your main screen, a game you play, your settings menu on your iPhone, or even a video call that you’re on at the right moment.
To access the menu for quick access (Control Center), you can swipe upwards at the bottom of the phone, where the home button is situated. It’s the same place in which you typically can access cameras, flashlights, and other functions on the iPhone. To start recording, click on the Recorder icon on your computer’s desktop.
To help you get ready, there should be a 3-second countdown on the screen. Once the three seconds have elapsed, it’s normal for iOS to begin recording. The red line that appears at high-up on your iPhones screen signifies that recording is currently in progress.
To end recording To complete recording, press the button for recording or the red line. A confirmation window will pop up. Click Stop to end the recording or Cancel to record again. When the recording is finished, a message on your screen’s upper right should indicate that it has been completed. You will also see that the video has been saved to the folder Photos.
In certain situations, it is possible to record the screen but not record the audio. Perhaps you’d like to share a short instructional video with someone else, but there’s too much noise. If the video content is sufficient for the task, there’s no reason to be concerned about the audio, Since talking through the background noise could decrease the quality of the recording.
Deleting your microphone is quite simple. The same procedure can be followed for recording the screen of your iPhone. But, instead of enabling the microphone, ensure that it’s turned off. There’s a separate symbol for the mic when you record the screen. You’ll notice it quickly, and tapping the icon will allow you to enable or deactivate the microphone during the recording.